Pages

Followers

Access computer inside Lan network

I will write about hacking computer inside the LAN network.
This technique will be taking advantage of Port 139.
Most of the time,Port 139 will be opened.
First of all,I will do a port scanning at the target computer which is 192.168.40.128.
This computer is inside my LAN network.
I will scan it using Nmap.


I get the result and it shows Port 139 is opened up for me.

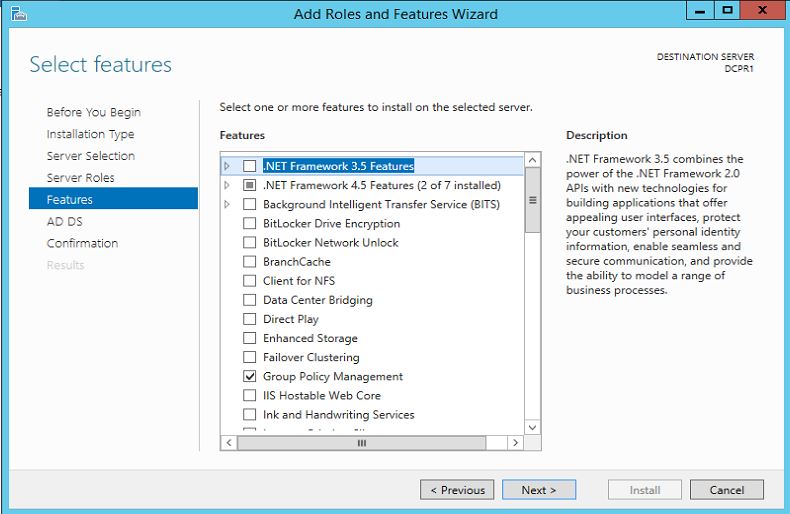
Now you will need both of these tools:
** USER2SID & SID2USER
** NetBios Auditing Tool

You can get both of them on the Internet.
After you get both of them,put them in the C:\ directory.
You now need to create a null session to the target computer.
Now open the Command Prompt and browse to the USER2SID & SID2USER folder.There will be 2 tools inside it,one will be USER2SID and another one will be SID2USER.
We will first using USER2SID to get the ID.
          We will test against the Guest account because Guest account is a built in account.
After we get the ID,we need to do some modification on the ID.
We take the ID we get from the guest account and modified it become
"5 21 861567501 1383384898 839522115 500".
Please leave out the S-1-,leave out all the - too.

          Now you will see that you get the username of the Administrator account.
 In this case,the Administrator account is Administrator.

 Create a text file called user.txt and the content will be the username of the Admin     account.
           Prepare yourself a good wordlist.
     Now put both of them in the same directory with the NetBios Auditing Tool.


Now we are going to crack the Admin account for the password in order to access to the target computer.
Browse to the NetBios Auditing Tool directory.
Press on enter and the tool will run through the passlist.
 In this case,I have get the password.
 In order to proof that I can get access to the target computer using this password.
After you press enter,it will prompt you for the username and password.
Therefore,just input them inside the prompt and continue.
Target C drive will be on your screen.
In order to prevent from this attack,close down port that you do not want to use such as Port 135,Port 136,Port 137,Port 138 and Port 139.

Active Directory on Windows Server 2012

Step by Step guide to setup Active Directory on Windows Server 2012

This tutorial will explain how to install AD on server 2012 R2.
Requirement:
Minimum: 1.4 Ghz 64-bit processor
Minimum: 512 MB RAM
Minimum: 32 GB or greater
The first step is to get server 2012 install on a server. it is very similar to server 2008 install and in one of my previous posts i have discribe how to do the install in details.

Next thing we need to do is get network interfaces configured. it is obvious to use static ip address for the server. Since the server will be act as DNS server, for DNS server field you can use local host address 127.0.0.1
It is recommend to use meaning full name as the server name. in demo i renamed it as "DCPR1"
After this we are ready to start on the AD install. As per my next step i will start DNS role install first. This is not must to do, you also can install dns during the AD install. But as per best practice i always prefer to add DNS role first.
To do this we need to start "Server Manager" it can opne using shortcut on task bar or from Start > Server Manager
Then in Server Manager window click on option "Add roles and features" option.
Then it will load the "Add Role Wizard", Click next to continue

In next window keep "Role-based or feature-based installation" default selection and click on next.
In next window we can select which server to install role. in our case it will be local. so keep the default selection and click on next.
In next window it give option to select the roles. select the "DNS Server" and click on box to tick it.
Then it will prompt window to inform about the related additional features which DNS role need. click on "Add features" to continue.
In next window it gives option to select any additional feature, but in here i will keep it default. click on next to continue
Then it will give brief introduction about the DNS role, click on next button to continue
In next window it will give details about the selected features and click on "Install" to begin the installation
Then it will begin the installation and we need to wait till it completes.
Once its completes click on close.
Then you can access DNS server using server manager > tools > DNS

Now we have every thing ready for AD install. so lets load server manager again and click on "Add roles and features"
Then it will load the "Add roles and features" wizard. click on next to continue.
In next window keep "Role-based or feature-based installation" default selection and click on next.
In next window we can select which server to install role. in our case it will be local. so keep the default selection and click on next.
In next window it gives option to select the roles. select and click on tick box "Active Directory Domain Services"
Then it will prompt window to indicate the additional feature installations related to selected role. click on "Add Features" to continue.
Then in next window click on next to continue
In next window it will give option to select addtional feature to install. but i will keep the default selection. click next to install.
In next window it give brief description about the AD service. click on next to continue.
In next window it gives brief about the installation. click on "install" to start the installation.
In next window it will begins the service install and we have to wait till it finish.
Once it finish click on "close" to exit from the wizard. then next step is to reboot the server to complete the installation.
After that completes we need to start on the DC setup. to start that open the "Server Manager" and click Task flag on right hand corner. then it will list option as below picture. click on "promote this server to a domain controller" option ( highlighted with yellow in picture)
Then it starts the DCPROMO wizard. on the first window since its going to be new forest i have selected option "Add a new forest" and i typed the domain name "contoso.com" which i will be using on the forest. once fill the info click on "next" to continue.
In next window we can select the forest and domain functional levels. i will keep it default. then in domain controller capabilities its by default selected DNS server and Global Catalog as its first DC in the forest. then we need to defined password to use in DC recovery. click on next to continue.
In next window it will give following error but it can be ignore. click on next to continue.
In next window it ask for the netbios name. we can keep it default and click on next to continue.
In next window it give option to change file paths for AD database, log files and SYSVOL files. we can change the paths or keep them defaults. once changes are done click on next to continue.
In next window it gives description about the installation. click on next to continue.
In next window it will run system check and verify system is compatible with the selected installation. once test completes successfully click on install button to begin the installation. if its passes any critical errors those needs to be address before the installation begin.
then it will start the install and we need to wait till it finishes.
Once its complete the install it will automatically reboot the server.
Once server is rebooted log in to server using domain admin credentials.
In our demo it will be in format of
user : contosoAdministrator
password : XXXXXXXXX
Once login, load the "Server manager" and click on "AD DS" option in right hand list. then select and right click as showed in screenshot to start with AD configuration.

Now we successfully completed with the DC setup on server 2012 

Activate Windows 10 / Server 2016 Through Command

How To Activate Windows10 / Server 2016 Through Command Line

If you are having problems activating Windows 10, Server 2016, Windows 8, or Server 2012 one of these three solutions below should get you through:
Command Line to Launch Activation GUI:
This is handy if the GUI won’t start and you want to skip some steps to get it to work:
  1. click START (gets you to the tiles)
  1. type RUN
  1. type slui 3 and press ENTER
yes, SLUI: which stands foR
        
SOFTWARE LICENSING USER INTERFACE
  1. SLUI 1 brings up the activation status window
  2. SLUI 2 brings up the activation window
  3. SLUI 3 brings up the CHANGE PRODUCT KEY window
  1. SLUI 4 brings up the CALL MICROSOFT & MANUALLY ACTIVATE window
  1. Type in your product key
  1. Have a nice day.


   Command Line to Activate Windows

    Through Command Line:
1. Launch a CMD as an Administrator
2. Type: slmgr.vbs /ipk xxxxx-xxxxx-xxxxx-xxxxx-xxxxx
3. Press Enter
      

Activate using Key Management Service

Activate using Key Management Service

Applies to

Windows 10
Windows 8.1
Windows 8
Windows 7
Windows Server 2012 R2
Windows Server 2012
Windows Server 2008 R2
Looking for retail activation?
There are three possible scenarios for volume activation of Windows 10 or Windows Server 2012 R2 by using a Key Management Service (KMS) host:
    Host KMS on a computer running Windows 10
    Host KMS on a computer running Windows Server 2012 R2
    Host KMS on a computer running an earlier version of Windows

Key Management Service in Windows 10

Installing a KMS host key on a computer running Windows 10 allows you to activate other computers running Windows 10 against this KMS host and earlier versions of the client operating system, such as Windows 8.1 or Windows 7. Clients locate the KMS server by using resource records in DNS, so some configuration of DNS may be required. This scenario can be beneficial if your organization uses volume activation for clients and MAK-based activation for a smaller number of servers. To enable KMS functionality, a KMS key is installed on a KMS host; then, the host is activated over the Internet or by phone using Microsoft’s activation services.

Configure KMS in Windows 10

  1. Open an elevated command prompt.
  1. Enter one of the following commands.
To install a KMS key, type slmgr.vbs /ipk .
To activate online, type slmgr.vbs /ato.
To activate by using the telephone, type slui.exe 4.
       3. After activating the KMS key, restart the Software Protection Service.
For more information, see the information for Windows 7 in Deploy KMS Activation.

Key Management Service in Windows Server 2012 R2

     Installing a KMS host key on a computer running Windows Server allows you to activate computers running Windows Server 2012 R2, Windows Server 2008 R2,         Windows Server 2008, Windows 10, Windows 8.1, Windows 7, and Windows vista.
Note  You cannot install a client KMS key into the KMS in Windows Server.
This scenario is commonly used in larger organizations that do not find the overhead of using a server a burden.
Note: If you receive error 0xC004F015 when trying to activate Windows 10 Enterprise, see   KB3086418.

Configure KMS in Windows Server 2012 R2

  1. Sign in to a computer running Windows Server 2012 R2 with an account that has local administrative credentials.
  1. Launch Server Manager.
  1. Add the Volume Activation Services role, as shown in Figure 4.
 Figure 4. Adding the Volume Activation Services role in Server Manager
  1. When the role installation is complete, click the link to launch the Volume Activation Tools (Figure 5).
Figure 5. Launching the Volume Activation Tools

e. Select the Key Management Service (KMS) option, and specify the                  computer that will act as the KMS host (Figure 6). This can be the same              computer on which you installed the role or another computer. For example,       it can be a client computer running Windows 10.
Figure 6. Configuring the computer as a KMS host
  1. Install your KMS host key by typing it in the text box, and then click Commit (Figure 7).
Figure 7. Installing your KMS host key
  1. If asked to confirm replacement of an existing key, click Yes.
  1. After the product key is installed, you must activate it. Click Next (Figure 8).
Figure 8. Activating the software
The KMS key can be activated online or by phone. See Figure 9.
Figure 9. Choosing to activate online
Now that the KMS host is configured, it will begin to listen for activation requests.
However, it will not activate clients successfully until the activation threshold is met.

Verifying the configuration of Key Management Service

You can verify KMS volume activation from the KMS host server or from the client computer. KMS volume activation requires a minimum threshold of 25 computers before activation requests will be processed. The verification process described here will increment the activation count each time a client computer contacts the KMS host, but unless the activation threshold is reached, the verification will take the form of an error message rather than a confirmation message. Note
If you configured Active Directory-based activation before configuring KMS activation, you must use a client computer that will not first try to activate itself by using Active Directory-based activation. You could use a workgroup computer that is not joined to a domain or a computer running Windows 7 or Windows Server 2008 R2.
To verify that KMS volume activation works, complete the following steps:
  1. On the KMS host, open the event log and confirm that DNS publishing is successful.
  1. On a client computer, open a Command Prompt window, type Slmgr.vbs /ato, and then press ENTER.
The /ato command causes the operating system to attempt activation by using whichever key has been installed in the operating system. The response should show the license state and detailed Windows version information.
  1.  On a client computer or the KMS host, open an elevated Command Prompt window, type Slmgr /dlv, and then press ENTER.

The /dlv command displays the detailed licensing information. The response should return an error that states that the KMS activation count is too low. This confirms that KMS is functioning correctly, even though the client has not been activated.
For more information about the use and syntax of slmgr.vbs, see Slmgr.vbs Options.

Key Management Service in earlier versions of Windows

If you have already established a KMS infrastructure in your organization for an earlier version of Windows, you may want to continue using that infrastructure to activate computers running Windows 10 or Windows Server 2012 R2. Your existing KMS host must be running Windows 7 or later. To upgrade your KMS host, complete the following steps:
  1. Download and install the correct update for your current KMS host operating system. Restart the computer as directed.
  1. Request a new KMS host key from the Volume Licensing Service Center.
  1. Install the new KMS host key on your KMS host.
  1. Activate the new KMS host key by running the slmgr.vbs script.

Automatic Refresh Failed in server manager

Automatic Refresh Failed
Today we are going to see how to resolve the situation where server gives a red flag with error "Automatic Refresh Failed." and "Server manager is collecting Inventory Data. The wizard will be available after data collection finishes."

Generaly this error appears when you try to add/remove roles from server manager.

So on my Server 2k12 which is installed on virtual machine, when I tried to add roles on it, it gave me the following error : "Server manager is collecting Inventory Data. The wizard will be available after data collection finishes."

Further when I tried to refresh the server manager, it shows "Refresh Failed". No metter how many times you try to refresh it, the count of failure here increases with each click. And when you click on the Red Flag here, it shows the Automatic Refresh Failed. So this is a frustrating situation where you wont be able to add/remove roles or features or any other activity on server manager.

So in order to resolve this issue, open command prompt with Administrative Rights. You can do that by right clicking on CMD and then click on "Run as Administrator". Change the default directory to

C:\Windows\System32

Once you do that, type the following command.

dir /a /S *.MOF

This command will search all the .mof files. It is the file format for Windows Management Object files. WMI data (such as definitions of namespaces, classes, instances, or providers) are sometimes represented in MOF files.

Now change the directory path to wbem by typing CD Wbem and then cd AutoRecover.

now type this simple command

for /f %s in ('dir /b *.mof *.mfl') do mofcomp %s

and hit enter.

It will Recover all the .mof files that have been currupted and created an issue with Server Manager. It will take some time to recover all the files.

Once it gets completed, type Exit to close the Command Prompt.

Now go to the server manager and click on Refresh Icon and then click on Red Flag to check the status. You can see the server refresh is in progress instead of giving an error "refresh failed".

Now it will take some time to refresh the server and finally without giving us an error of Server Refresh failed, it successfully refresh the server, which in result allows you to install Roles and Features on server.

Automatic Refresh Failed
Today we are going to see how to resolve the situation where server gives a red flag with error "Automatic Refresh Failed." and "Server manager is collecting Inventory Data. The wizard will be available after data collection finishes."
Generaly this error appears when you try to add/remove roles from server manager.
So on my Server 2k12 which is installed on virtual machine, when I tried to add roles on it, it gave me the following error : "Server manager is collecting Inventory Data. The wizard will be available after data collection finishes."
Further when I tried to refresh the server manager, it shows "Refresh Failed". No metter how many times you try to refresh it, the count of failure here increases with each click. And when you click on the Red Flag here, it shows the Automatic Refresh Failed. So this is a frustrating situation where you wont be able to add/remove roles or features or any other activity on server manager.
So in order to resolve this issue, open command prompt with Administrative Rights. You can do that by right clicking on CMD and then click on "Run as Administrator". Change the default directory to
C:\Windows\System32
Once you do that, type the following command.
dir /a /S *.MOF
This command will search all the .mof files. It is the file format for Windows Management Object files. WMI data (such as definitions of namespaces, classes, instances, or providers) are sometimes represented in MOF files.
Now change the directory path to wbem by typing CD Wbem and then cd AutoRecover.
now type this simple command
for /f %s in ('dir /b *.mof *.mfl') do mofcomp %s
and hit enter.
It will Recover all the .mof files that have been currupted and created an issue with Server Manager. It will take some time to recover all the files.
Once it gets completed, type Exit to close the Command Prompt.
Now go to the server manager and click on Refresh Icon and then click on Red Flag to check the status. You can see the server refresh is in progress instead of giving an error "refresh failed".
Now it will take some time to refresh the server and finally without giving us an error of Server Refresh failed, it successfully refresh the server, which in result allows you to install Roles and Features on server.

AutoRedial for VPN Connections in Windows

AutoRedial for VPN Connections in Windows 8/10 & server 2012

I was surprised, not much, however, when I found that in Windows 8 and Windows Server 2008 or higher Microsoft had slightly “refined” the VPN connection settings. To be more precise, removed a number of settings in the Options tab. Here is what it looked like in Windows 7:
Now(Windows 8, Windows 10) almost everything has been removed:
A natural question has arised — how to configure automatic reconnection and the number of attempts to establish the connection if it is interrupted?
There are several ways to do it. Let’s start with the beginning, according to the level of difficulty.

Method 1 — Using Notepad
You have to set the parameters manually. To do it, go to the folder
C:Users[USER]AppDataRoamingMicrosoftNetworkConnectionsPbk
There, find a file (it is likely to be only one) with the name rasphone.pbk. It is a usual text file, which contains the VPN connection settings
You can open this file using notepad.exe
Usually you have to find a section containing your VPN, e. g., like this [PPTP-VPN]
Find the lines in it. If you haven’t made any changes, they look like this:
RedialAttempts=3
RedialSeconds=60
IdleDisconnectSeconds=0
RedialOnLinkFailure=1
So Microsoft has decided it for you again.
But now you know where to find and change the necessary parameters.
  • RedialAttempts=3                 – the number of redial attempts (99 maximum)
  • RedialSeconds=60                 – the number of seconds between the redial attempts
  • IdleDisconnectSeconds=0     — the waiting time before it becomes clear that there is a disconnection (0 – don’t wait)
  • RedialOnLinkFailure=1         — Redial if connection fails? 1 – yes, 0 – no
To apply the parameters, you have to restart your VPN connection, as earlier.
And then believe that Microsoft will do everything for you
Note. It has been noticed that Windows Server 2012 can use C:Users[USER]AppDataRoamingMicrosoftNetworkConnectionsPbk\_hiddenPbk folder on its own initiative and locate rasphone.pbk in this folder.
Method 2 — Configuration of a Simple Task
Create a task in Task Scheduler, which will run a BAT file containing the VPN connection string and configure this task so that it runs, say, every 5 minutes.
I should remind that the command string to establish a VPN connection looks like this:
C:windowssystem32 asdial.EXE entryname [username [password|*]] [/DOMAIN:domain]
There are other parameters, but if it is interesting to you find them yourself.
Don’t forget to check “Run whether user is logged on or not” in the task settings
Specify the executable file, for example:
Or let rasdial.exe start (VPN User Password is the name of your VPN connection, user_name and password)

Start it every 5 minutes every day.
Method 3 — Configure a Tricky Task
  1. Create a task in Task Scheduler
  2. Set two triggers in the task. The first one will use an XML query (like it has been described in the article “How to Start a Scheduler Task After the Previous Task“)


Note. Values: 829 — Remote Disconnect, 629 -Client Disconnect
The second trigger is based on tracking of the event in the Event Log:
  • Log name: Microsoft-Windows-NetworkProfile/Operational
  • Source: NetworkProfile
  • Event ID: 10000
  • Select rasdial.exe with the parameters vpn-name username password as a program to be started
  • Also, in the Conditions tab, you can check the following parameters:
Note. To make sure if this task works, create another trigger with the Event ID = 10001. This event appears when VPN is disconnected manually. After that, try to disconnect the VPN manually. The connection will be restored immediately.
That’s all.

Note. The methods described above are also applicable to Windows 7