Step by Step guide to setup Active Directory on Windows Server 2012
This tutorial will explain how to install AD on server 2012 R2.
Requirement:
Minimum: 1.4 Ghz 64-bit processor
Minimum: 512 MB RAM
Minimum: 32 GB or greater
The first step is to get server 2012 install on a server. it is very similar to server 2008 install and in one of my previous posts i have discribe how to do the install in details.

Next thing we need to do is get network interfaces configured. it is obvious to use static ip address for the server. Since the server will be act as DNS server, for DNS server field you can use local host address 127.0.0.1
It is recommend to use meaning full name as the server name. in demo i renamed it as "DCPR1"

After this we are ready to start on the AD install. As per my next step i will start DNS role install first. This is not must to do, you also can install dns during the AD install. But as per best practice i always prefer to add DNS role first.
To do this we need to start "Server Manager" it can opne using shortcut on task bar or from Start > Server Manager
To do this we need to start "Server Manager" it can opne using shortcut on task bar or from Start > Server Manager

Then in Server Manager window click on option "Add roles and features" option.
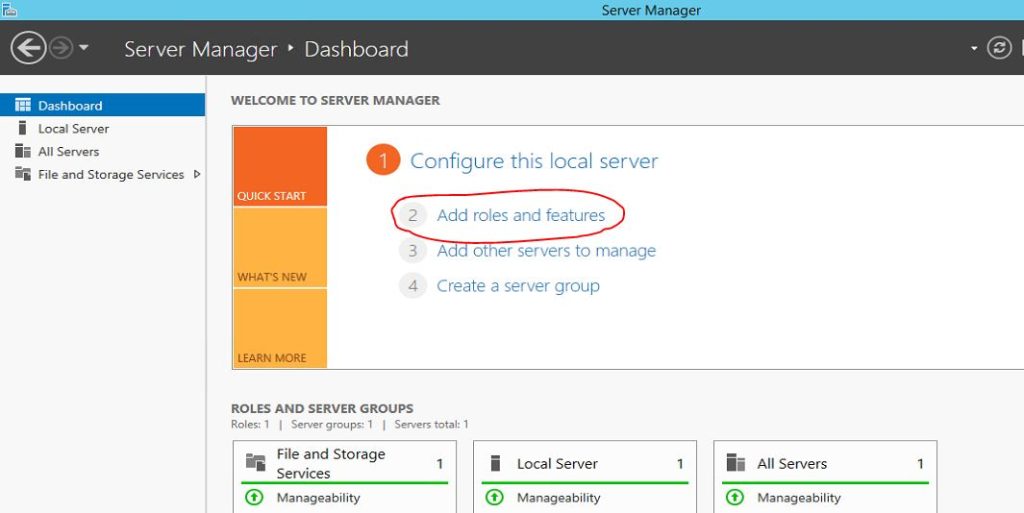
Then it will load the "Add Role Wizard", Click next to continue

In next window keep "Role-based or feature-based installation" default selection and click on next.
In next window we can select which server to install role. in our case it will be local. so keep the default selection and click on next.
In next window it give option to select the roles. select the "DNS Server" and click on box to tick it.
Then it will prompt window to inform about the related additional features which DNS role need. click on "Add features" to continue.
In next window it gives option to select any additional feature, but in here i will keep it default. click on next to continue
Then it will give brief introduction about the DNS role, click on next button to continue
In next window it will give details about the selected features and click on "Install" to begin the installation
Then it will begin the installation and we need to wait till it completes.
Once its completes click on close.
Then you can access DNS server using server manager > tools > DNS
Now we have every thing ready for AD install. so lets load server manager again and click on "Add roles and features"
Then it will load the "Add roles and features" wizard. click on next to continue.
In next window keep "Role-based or feature-based installation" default selection and click on next.
In next window we can select which server to install role. in our case it will be local. so keep the default selection and click on next.
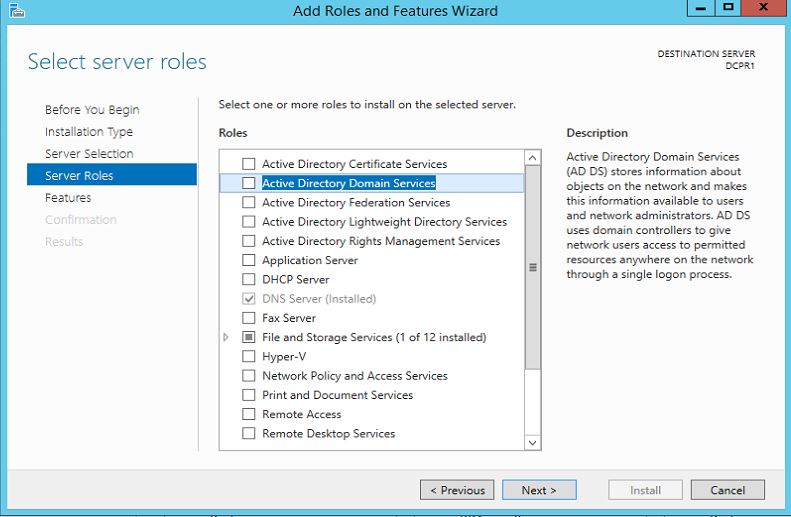
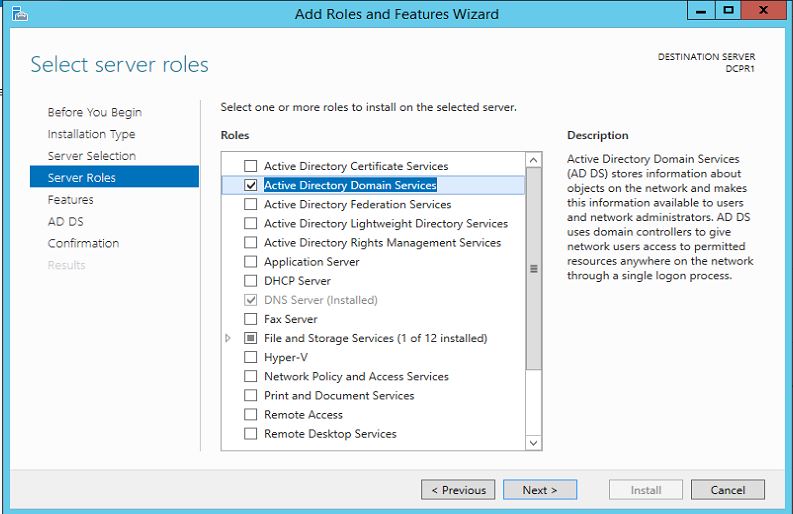
In next window it gives option to select the roles. select and click on tick box "Active Directory Domain Services"
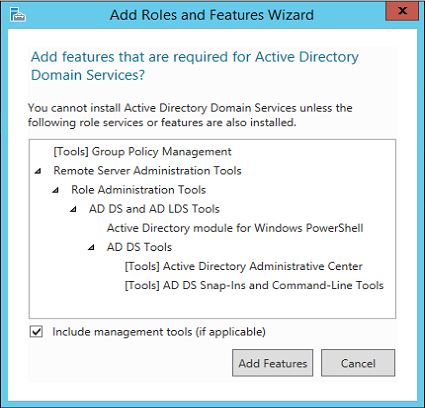
Then it will prompt window to indicate the additional feature installations related to selected role. click on "Add Features" to continue.
Then in next window click on next to continue
In next window it will give option to select addtional feature to install. but i will keep the default selection. click next to install.
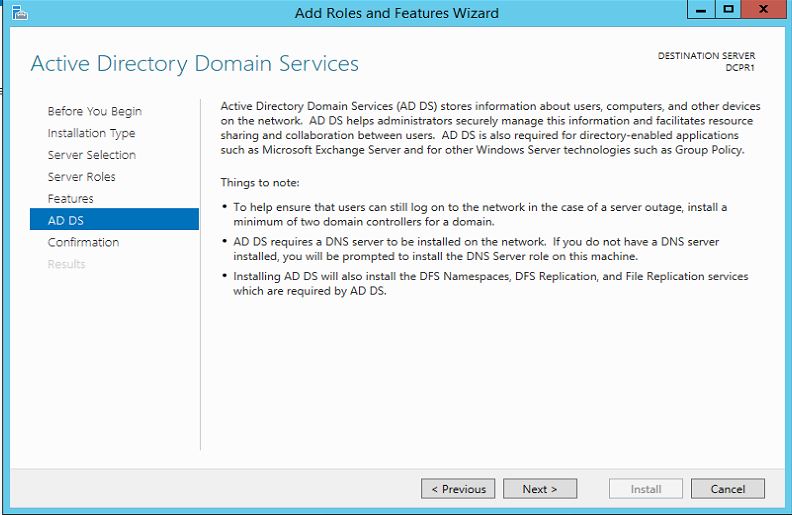
In next window it give brief description about the AD service. click on next to continue.
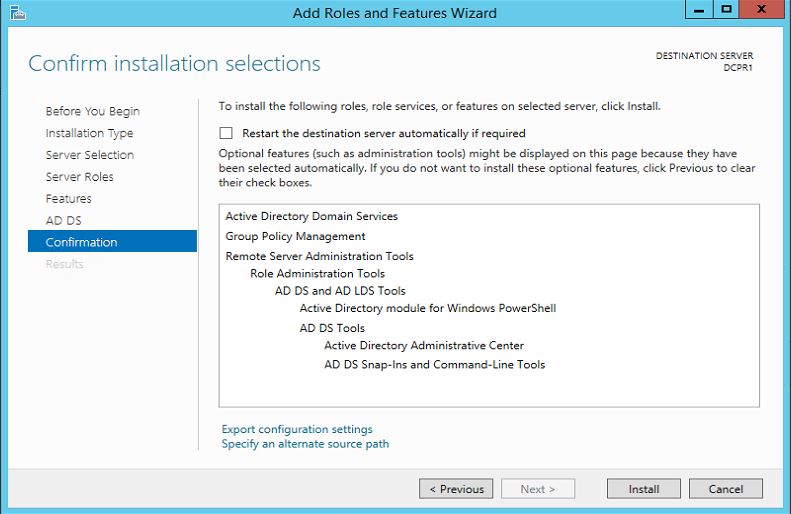
In next window it gives brief about the installation. click on "install" to start the installation.
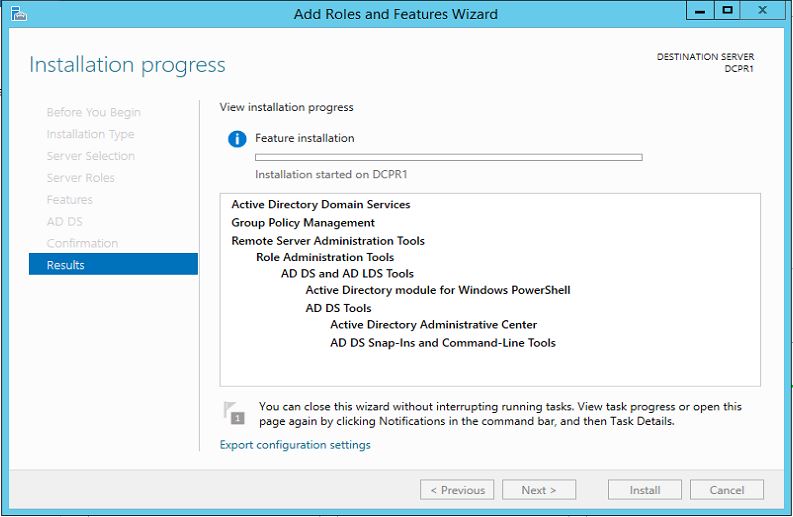
In next window it will begins the service install and we have to wait till it finish.
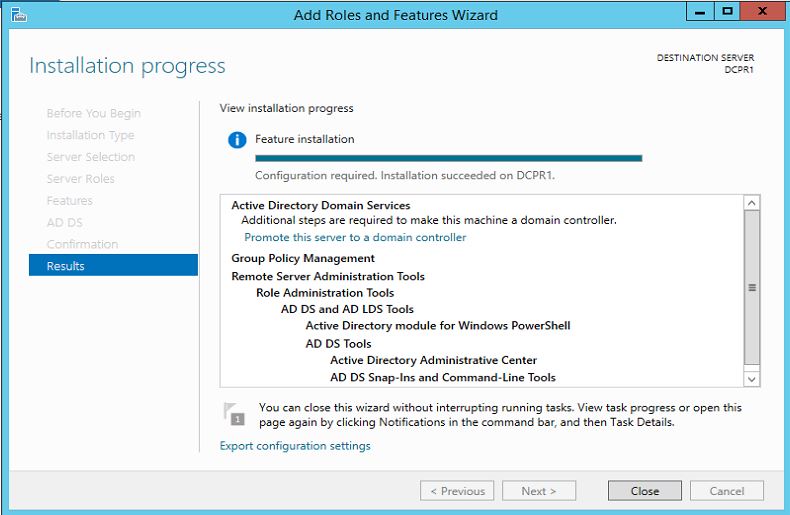
Once it finish click on "close" to exit from the wizard. then next step is to reboot the server to complete the installation.
After that completes we need to start on the DC setup. to start that open the "Server Manager" and click Task flag on right hand corner. then it will list option as below picture. click on "promote this server to a domain controller" option ( highlighted with yellow in picture)
Then it starts the DCPROMO wizard. on the first window since its going to be new forest i have selected option "Add a new forest" and i typed the domain name "contoso.com" which i will be using on the forest. once fill the info click on "next" to continue.
In next window we can select the forest and domain functional levels. i will keep it default. then in domain controller capabilities its by default selected DNS server and Global Catalog as its first DC in the forest. then we need to defined password to use in DC recovery. click on next to continue.
In next window it will give following error but it can be ignore. click on next to continue.
In next window it ask for the netbios name. we can keep it default and click on next to continue.
In next window it give option to change file paths for AD database, log files and SYSVOL files. we can change the paths or keep them defaults. once changes are done click on next to continue.
In next window it gives description about the installation. click on next to continue.
In next window it will run system check and verify system is compatible with the selected installation. once test completes successfully click on install button to begin the installation. if its passes any critical errors those needs to be address before the installation begin.
then it will start the install and we need to wait till it finishes.
Once its complete the install it will automatically reboot the server.
Once server is rebooted log in to server using domain admin credentials.
In our demo it will be in format of
user : contosoAdministrator
password : XXXXXXXXX
Once login, load the "Server manager" and click on "AD DS" option in right hand list. then select and right click as showed in screenshot to start with AD configuration.
Now we successfully completed with the DC setup on server 2012





No comments:
Post a Comment
Note: Only a member of this blog may post a comment.